Starting with SQL 2005 SP1 Standard Edition, you had the ability to setup and configure Database Mirroring. This was a step up from the previous Data Replication options of Log Shipping (Only available in SQL 2000 Enterprise), and Database Publishing/Subscription and more cost effective than SQL Clustering as a means to provide local redundancy for your databases. The process of setting up DB Mirroring is a manual one. You must either use the management Console UI Wizard, or perform the like steps through individual T-SQL Scripts. There is currently no way to configure SQL initially to create Mirrors of your databases that you create by inputting the name of another SQL Server somewhere.
At one of my previous jobs, I was tasked with automating this for a Hosting Environment where the creation of Databases was dynamic and part of a sign-up process for a SaaS web application. Since many databases could be created throughout a given day, it was desired to have a means to automatically create redundancy for those databases via SQL Mirroring. So I starting investigating how this could be done. The individual steps were easily scriptable to setup mirring. It was the creation of the Database event that I needed to have visibility on since databases could be created from the SQL Server Management Console, the Web Application Managed Code, or the Administration Management Console for the web application. The logical place for this was on the SQL Server. I had worked with Triggers before so I decided to start looking there.
Regular DML triggers would not work since those fire in response to UPDATE, INSERT, or DELETE statements on a table or view. DDL Triggers however, fire in response to a variety of Data Definition Language (DDL) events. These events primarily correspond to Transact-SQL statements that start with the keywords CREATE, ALTER, and DROP. This was obviously a perfect fit for the solution as I needed to have visibility over CREATE DATABASE events. Now I was ready.
Prerequisites and Preliminary Steps
- Setup and Configure a Secondary SQL Server (Should be identical to source server – version, service pack, and license type)
- Enable TCP/IP protocol for SQL Server in Connections
- Setup a Network Share for Backup ad Restore operations – something like \\dfsroot\sqlbackup
- Enable use of xp_cmdshell stored procedure (Surface Area Configuration Tool or Facet if using SQL 2008)
It is unfortunately not possible to just create a trigger to perform all the actions you desire – I tried that first :-). So this method involves the creation of 4 components – an event sink table, a workload stored procedure, a Data Definition Language (DDL) Trigger, and a SQL Server Agent Job which executes the aforementioned stored procedure on a desired interval.
Script 1 – Create an Event Sink Table
This table will hold the names and events of the SQL events where a CREATE database action occurred. The event type is really no necessary since we are ony interested in the Database Name
USE [master]
GO
/****** Object: Table [dbo].[new_db_table] Script Date: 05/19/2008 15:26:56 ******/
SET ANSI_NULLS ON
GO
SET QUOTED_IDENTIFIER ON
GO
CREATE TABLE [dbo].[new_db_table](
[name] [nvarchar](100) NULL,
[event] [nvarchar](100) NULL
) ON [PRIMARY]
Script 2 – Create the Automation Stored Procedure
This is the main script that does the job of checking the actions table, performing the initial backupsIn SQL 2005, there is no database event for an attach database action even though in reality this is a CREATE_DATABASE event. This is resolved in SQL 2008 which will cause the trigger to add an entry in the actions table for both ATTACH and CREATE actions.
USE [master]
GO
/****** Object: StoredProcedure [dbo].[sp_auto_mirror_config] Script Date: 07/10/2008 10:56:15 ******/
SET ANSI_NULLS ON
GO
SET QUOTED_IDENTIFIER ON
GO
— ============================================================================
— Author: <Jeff Sani,jeffs@sitemasher.com>
— Create date: <4/9/2008>
— Description: <This stored proc automates the configuration of db mirroring>
— Syntax: <exec sp_auto_mirror_config>
— =============================================================================
CREATE proc [dbo].[sp_auto_mirror_config]
as
declare @dbname sysname, @bckstmt nvarchar(500), @cmd varchar(250), @bupath varchar(100)
declare @mirrorsp nvarchar(100), @mirrorsql nvarchar(500), @altersql nvarchar(250)
declare @primarysrvr nvarchar(50), @mirrorsrvr nvarchar(50), @witnesssrvr nvarchar(50), @domain nvarchar(50)
–set your sql server and backup paths here
set @bupath = ‘\\sql1\sqlbackup’
set @primarysrvr = ‘sql1’
set @mirrorsrvr = ‘sql2’
set @domain = ‘.staging.local’
set @witnesssrvr = ‘smres2’
set @mirrorsp = @mirrorsrvr + ‘.master.dbo.sp_executesql ‘
begin
if (select count(*) from new_db_table where event = ‘CREATE_DATABASE’) > 0
begin
create table #userdbs (name sysname)
insert into #userdbs select name from new_db_table
declare cdb cursor for select name from #userdbs
open cdb
fetch cdb into @dbname
while @@fetch_status = 0
begin
–Check to make sure that Auto_Close and Auto_Shrink DB Properties are correct and that Recovery is Full
set @altersql = ‘alter database ‘ + char(91) + @dbname + char(93) + ‘ set AUTO_CLOSE off’
exec (@altersql)
set @altersql = ‘alter database ‘ + char(91) + @dbname + char(93) + ‘ set AUTO_SHRINK on’
exec (@altersql)
set @altersql = ‘alter database ‘ + char(91) + @dbname + char(93) + ‘ set RECOVERY full’
exec (@altersql)
–perform initial database backup
set @bckstmt = ‘backup database ‘ + char(91) + @dbname + char(93)+ ‘ to ‘ +
‘disk = N’ + char(39) + @bupath + ‘\’ + @dbname + ‘.bak’ + char(39)
exec (@bckstmt)
–perform initial database log backup
set @bckstmt = ‘backUp log ‘ + char(91) + @dbname + char(93)+ ‘ to ‘ +
‘disk = N’ + char(39) + @bupath + ‘\’ + @dbname + ‘_log.bak’ + char(39)
exec (@bckstmt)
–perform database restore on linked remote mirror sql server
set @bckstmt = ‘restore database ‘ + char(91) + @dbname + char(93) + ‘ from ‘ +
‘Disk = N’ + char(39) + @bupath + ‘\’ + @dbname + ‘.bak’ + char(39) + ‘ with norecovery, replace’
exec @mirrorsp @bckstmt
–perform database log restore on linked remote mirror sql server
set @bckstmt = ‘restore log ‘ + char(91) + @dbname + char(93) + ‘ from ‘ +
‘Disk = N’ + char(39) + @bupath + ‘\’ + @dbname + ‘_log.bak’ + char(39) + ‘ with norecovery, replace’
exec @mirrorsp @bckstmt
–Initiate the mirroring on The Mirror server:
set @mirrorsql = ‘alter database ‘ + char(91) + @dbname + char(93) + ‘ set partner= N’+ char(39) + ‘TCP://’ + @primarysrvr + @domain + ‘:5022’ + char(39)
exec @mirrorsp @mirrorsql
–Initiate the mirroring on The Primary server:
set @mirrorsql = ‘alter database ‘ + char(91) + @dbname + char(93) + ‘ set partner= N’+ char(39) + ‘TCP://’ + @mirrorsrvr + @domain + ‘:5022’ + char(39)
exec (@mirrorsql)
–Enable the mirroring session on the Witness server:
set @mirrorsql = ‘alter database ‘ + char(91) + @dbname + char(93) + ‘ set witness= N’+ char(39) + ‘TCP://’ + @witnesssrvr + @domain + ‘:5022’ + char(39)
exec (@mirrorsql)
–cleanup
delete from new_db_table where name = @dbname
set @cmd = ‘del ‘ + @bupath + ‘\’ + @dbname + ‘.bak’
exec xp_cmdshell @cmd
set @cmd = ‘del ‘ + @bupath + ‘\’ + @dbname + ‘_log.bak’
exec xp_cmdshell @cmd
fetch cdb into @dbname
end
close cdb
deallocate cdb
drop table #userdbs
end
end
Script 3 – Create the Trigger
This will fire when an event occurs that matches CREATE_DATABASE and will populate the event sink table with the DB name.
/****** Object: DdlTrigger [trg_MirrorDDL] Script Date: 05/19/2008 15:31:55 ******/
SET ANSI_NULLS ON
GO
SET QUOTED_IDENTIFIER ON
GO
CREATE TRIGGER [trg_MirrorDDL]
ON ALL SERVER
FOR CREATE_DATABASE
AS
BEGIN
SET NOCOUNT ON;
DECLARE @data XML;
DECLARE @eventType sysname;
DECLARE @dbname varchar(100);
DECLARE @mirrorsql varchar(500);
SET @data = EVENTDATA();
SET @eventType = @data.value(‘(/EVENT_INSTANCE/EventType)[1]’, ‘sysname’);
SET @dbname = @data.value(‘(/EVENT_INSTANCE/ DatabaseName)[1]’, ‘sysname’);
–Add to new_db_table
Insert new_db_table(name,event) select @dbname,@eventType where not exists (select * from new_db_table where name = @dbname);
END
GO
SET ANSI_NULLS OFF
GO
SET QUOTED_IDENTIFIER OFF
GO
ENABLE TRIGGER [trg_MirrorDDL] ON ALL SERVER
Script 4 – Create the SQL Agent SVC Job
Main purpose of this job is to monitor the even sink for new entries. I had thought about having a tigger on the vent sink table, but you might not want to have the automation be on-demand so I thought a job which governed the execution of the workload stored procedure, would be better.
USE [msdb]
GO
/****** Object: Job [Mirroring Agent] Script Date: 05/19/2008 15:32:54 ******/
BEGIN TRANSACTION
DECLARE @ReturnCode INT
SELECT @ReturnCode = 0
/****** Object: JobCategory [[Uncategorized (Local)]]] Script Date: 05/19/2008 15:32:54 ******/
IF NOT EXISTS (SELECT name FROM msdb.dbo.syscategories WHERE name=N'[Uncategorized (Local)]’ AND category_class=1)
BEGIN
EXEC @ReturnCode = msdb.dbo.sp_add_category @class=N’JOB’, @type=N’LOCAL’, @name=N'[Uncategorized (Local)]’
IF (@@ERROR <> 0 OR @ReturnCode <> 0) GOTO QuitWithRollback
END
DECLARE @jobId BINARY(16)
EXEC @ReturnCode = msdb.dbo.sp_add_job @job_name=N’Mirroring Agent’,
@enabled=1,
@notify_level_eventlog=2,
@notify_level_email=0,
@notify_level_netsend=0,
@notify_level_page=0,
@delete_level=0,
@description=N’No description available.’,
@category_name=N'[Uncategorized (Local)]’,
@owner_login_name=N’SMNET\administrator’, @job_id = @jobId OUTPUT
IF (@@ERROR <> 0 OR @ReturnCode <> 0) GOTO QuitWithRollback
/****** Object: Step [Run Mirroring Stored Procedure] Script Date: 05/19/2008 15:32:55 ******/
EXEC @ReturnCode = msdb.dbo.sp_add_jobstep @job_id=@jobId, @step_name=N’Run Mirroring Stored Procedure’,
@step_id=1,
@cmdexec_success_code=0,
@on_success_action=1,
@on_success_step_id=0,
@on_fail_action=2,
@on_fail_step_id=0,
@retry_attempts=0,
@retry_interval=0,
@os_run_priority=0, @subsystem=N’TSQL’,
@command=N’USE [master]
GO
DECLARE @return_value int
EXEC @return_value = [dbo].[sp_auto_mirror_config]
SELECT ”Return Value” = @return_value
GO’,
@database_name=N’master’,
@flags=4
IF (@@ERROR <> 0 OR @ReturnCode <> 0) GOTO QuitWithRollback
EXEC @ReturnCode = msdb.dbo.sp_update_job @job_id = @jobId, @start_step_id = 1
IF (@@ERROR <> 0 OR @ReturnCode <> 0) GOTO QuitWithRollback
EXEC @ReturnCode = msdb.dbo.sp_add_jobschedule @job_id=@jobId, @name=N’Mirror Agent Schedule’,
@enabled=1,
@freq_type=4,
@freq_interval=1,
@freq_subday_type=4,
@freq_subday_interval=5,
@freq_relative_interval=0,
@freq_recurrence_factor=0,
@active_start_date=20080410,
@active_end_date=99991231,
@active_start_time=0,
@active_end_time=235959
IF (@@ERROR <> 0 OR @ReturnCode <> 0) GOTO QuitWithRollback
EXEC @ReturnCode = msdb.dbo.sp_add_jobserver @job_id = @jobId, @server_name = N'(local)’
IF (@@ERROR <> 0 OR @ReturnCode <> 0) GOTO QuitWithRollback
COMMIT TRANSACTION
GOTO EndSave
QuitWithRollback:
IF (@@TRANCOUNT > 0) ROLLBACK TRANSACTION
EndSave:
There may very well be a more eloquent way of doing this, but this method does work. Some other relevant info – While there is a really high limit of 32K databases that you can create on one SQL server, you would never want to do this as it would become a management nightmare. Further, you will reach a limit on the host at which mirroring (and really any feature such as replicaiton that uses TCP socket connections) will cease to function. I found this number to be 100. Having multiple instances on the same box does not help as this does not decrease the number of sockets consumed per database for mirroring or replication. Microsoft support recommends no more than 50 databases per server in a mirrored configuration. So if you are provisioning for the masses, make sure you have enought physical or virtual SQL server instances to accommdate the number of customers you plan on supporting. Hope this helps!


 Posted by Bellihammer
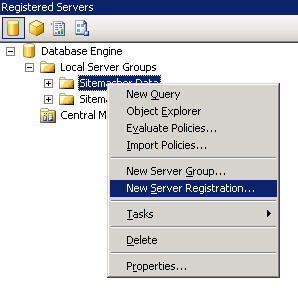
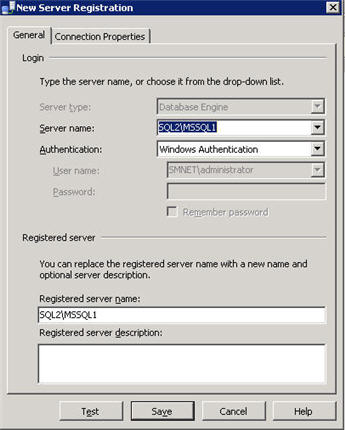
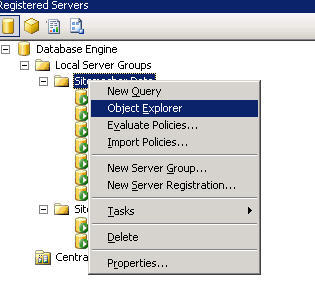
 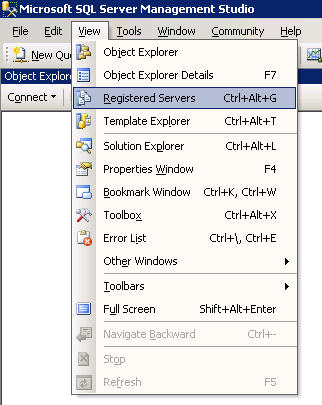 new feature of the Microsoft SQL Server Management Studio (MSSMS) that I discovered through curiosity was the concept of “Registered Servers”. Basically, as the name infers, these are SQL servers that you have setup connections to with the appropriate authentication type which you register with the MSSMS. You can even create groups of these servers so that you can logically separate them by function or location.